
When working with multiple machines, we often need to copy files from one machine to another. It can be quite tedious to have to copy items to an external drive and, then, from the external device to the target machine. However, we can make this process more streamlined by sharing files through the network.
In this article, we’ll learn how to share files between Linux and macOS. For that purpose, we’ll use Samba, which is the most common way to share files over a network.
Samba is a set of tools that enables sharing between networked devices. It uses the SMB (Server Message Block) protocol. SMB supports file and printer sharing as well as other resource sharing between computers.
macOS already comes with Samba pre-installed:$ which smbd /usr/sbin/smbdCopy
Afterward, we enable file sharing from the macOS System Settings by navigating to General → Sharing → File Sharing: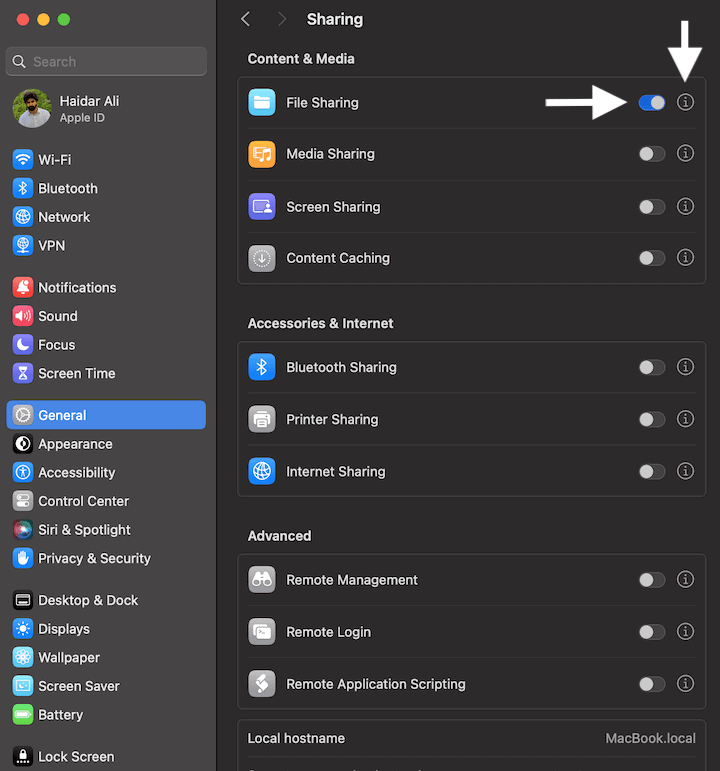
In addition, we can also set directories for sharing by selecting the information icon on the right. In the panel, we select the folders and set appropriate permissions for each: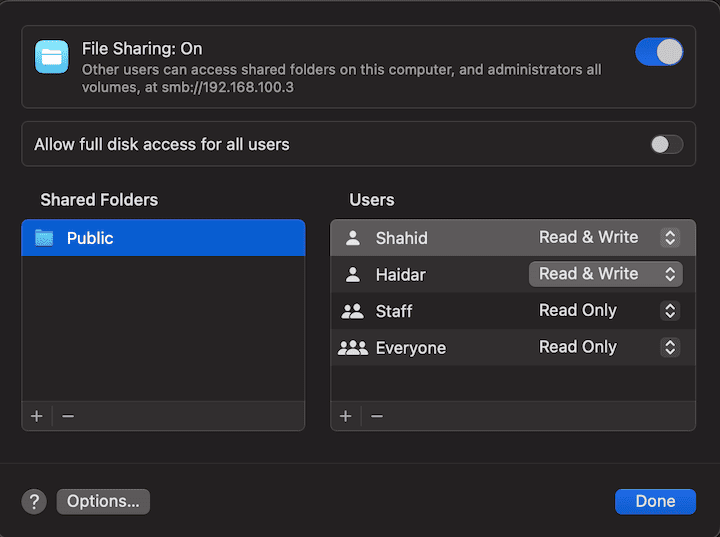
Moreover, let’s make sure that we have selected the account for access in the Options panel: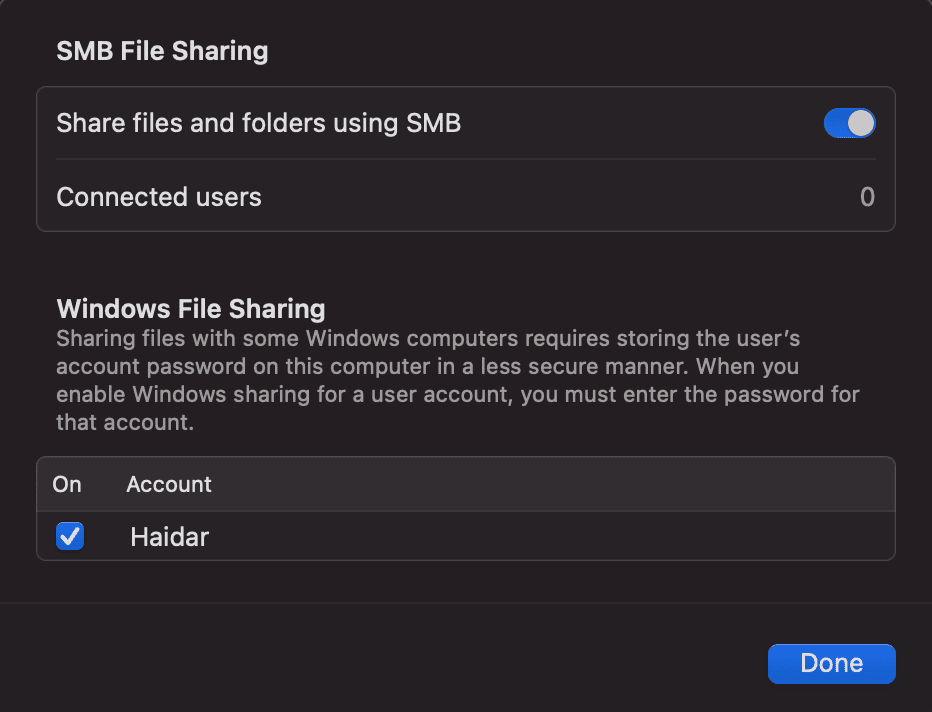
That’s it! We are now set to access the files on this Mac.
We access the files shared from the Mac through a Samba client. One of the most popular clients is smbclient. It’s not installed on most Linux distributions. However, it’s available on most official package repositories:# Debian and derivatives $ sudo apt install -y smbclient # Fedora and derivatives $ sudo dnf install -y smbclient # openSUSE $ sudo zypper install --non-interactive smbclient # Arch and derivatives $ sudo pacman -S --noconfirm smbclientCopy
Once installed, let’s verify it:$ smbclient --version Version 4.17.7-UbuntuCopy
Now, let’s go ahead and access our Public folder on the Mac:$ smbclient //MacBook.local/Public -U heyCopy
In the command, // signifies the SMB protocol and MacBook.local is the Mac’s local hostname, followed by the path to the shared folder. In addition, -U specifies the username, which is hey.
Upon executing, we’ll need to enter the password for user hey. Once we enter the valid password, we’ll be taken to the interactive prompt:Try "help" to get a list of possible commands. smb: \> Copy
Let’s enlist the files in the Public directory:smb: \> ls . D 0 Sat Jan 6 18:43:07 2024 .. D 0 Sat Jan 6 18:43:07 2024 offer-letter.pdf A 171436 Wed Dec 13 20:40:58 2023 adm-letter.pdf A 117894 Wed Dec 13 21:03:15 2023 124975692 blocks of size 4096. 75190733 blocks availableCopy
We’ll use lcd to change the local directory to Desktop on our Ubuntu machine:

smb: \> lcd /home/baeldung/DesktopCopy
Now, we’ll recursively copy all the files inside Public to the target local folder:smb: \> prompt recurse smb: \> mget * getting file \offer-letter.pdf of size 171436 as offer-letter.pdf (11161.1 KiloBytes/sec) (average 11161.2 KiloBytes/sec) getting file \adm-letter.pdf of size 117894 as adm-letter.pdf (11513.0 KiloBytes/sec) (average 11302.0 KiloBytes/sec)Copy
Let’s break this down:
That’s it! Let’s verify that our folders are copied:$ ls -l $HOME/Desktop total 5424 -rw-r--r-- 1 baeldung baeldung 117894 Jan 6 18:46 adm-letter.pdf -rw-r--r-- 1 baeldung baeldung 171436 Jan 6 18:46 offer-letter.pdf...Copy
In addition to smbclient, we can also access the shared folder using a file manager. For instance, we can fire up Nautilius or GNOME Files and head over to “Other Locations” in the sidebar. At the bottom, we provide the local address of the host: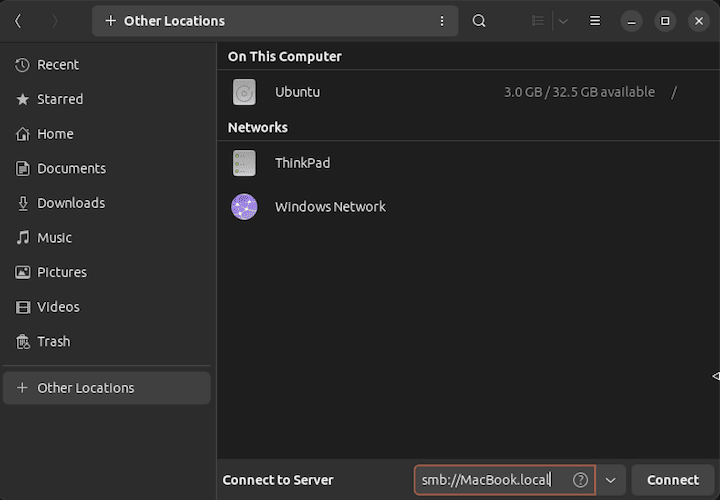
Afterward, we provide the necessary credentials. Once authenticated, we will be given access to that shared folder: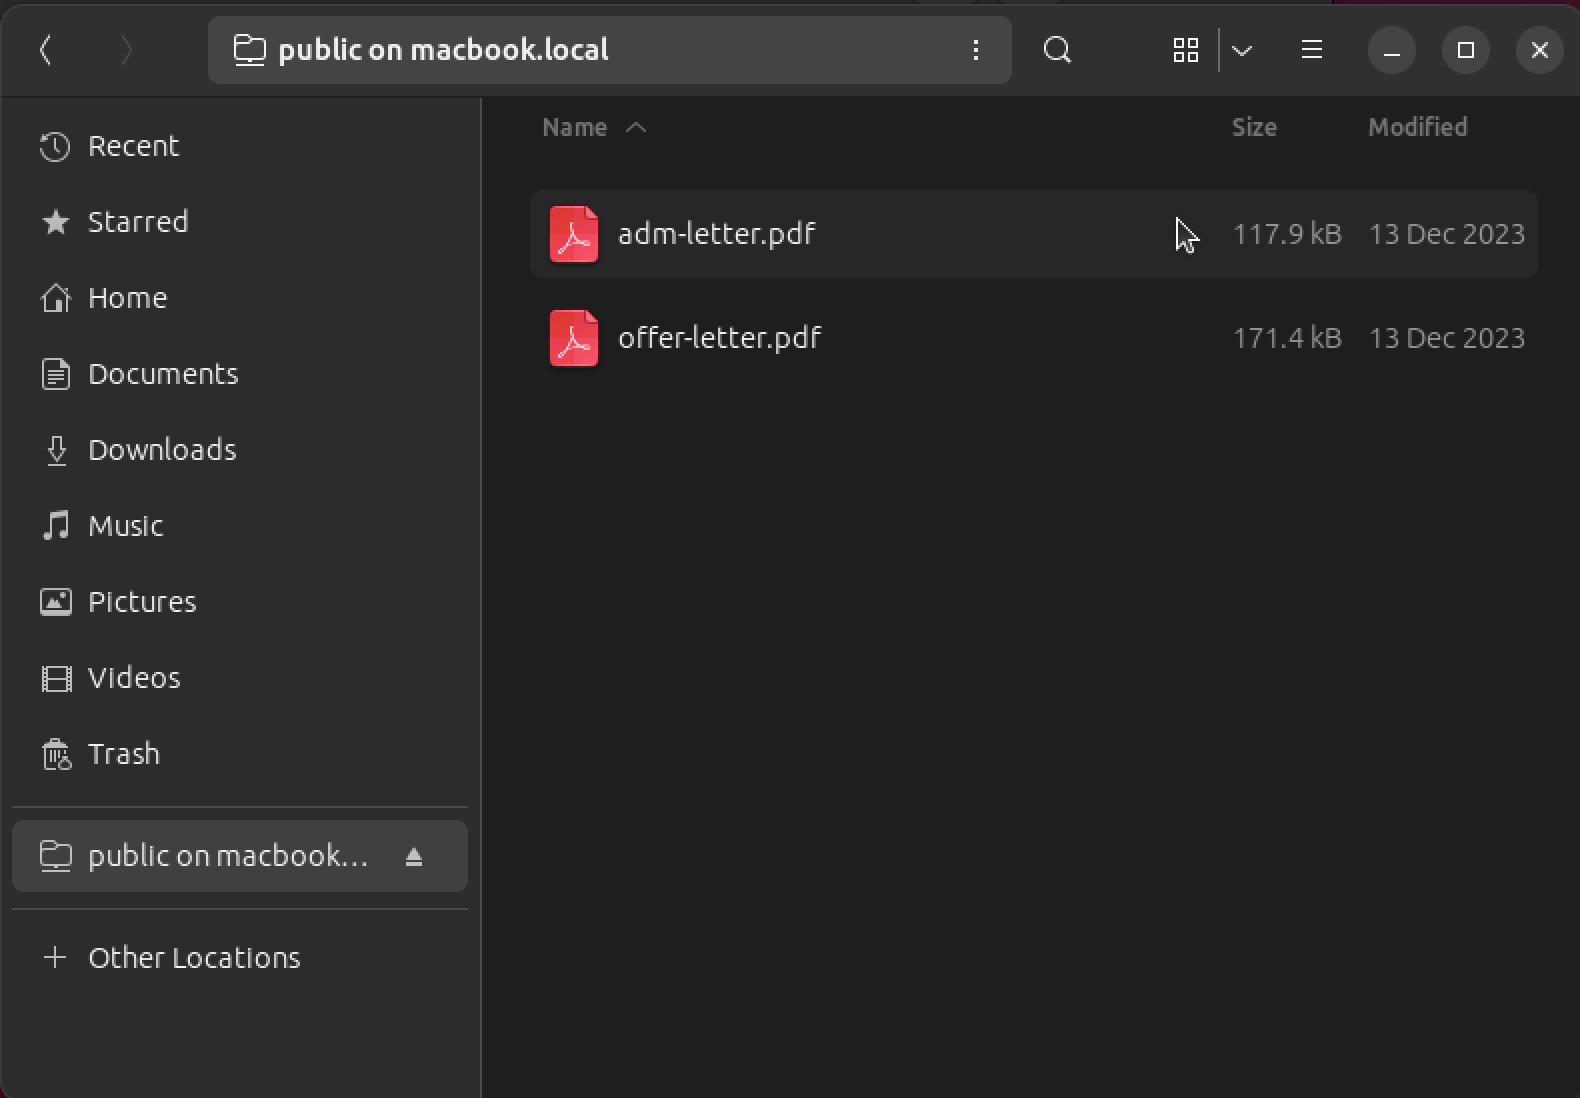
In this section, we’ll follow a similar approach. We’ll install, configure, and enable Samba as well as share a directory to access it from the Mac.
Samba is available in most official package repositories:# Debian and derivatives $ sudo apt install -y samba # Fedora and derivatives $ sudo dnf install -y samba # openSUSE $ sudo zypper install --non-interactive samba # Arch and derivatives $ sudo pacman -S --noconfirm sambaCopy
Once installed, let’s verify it:$ smbd --version Version 4.17.7-UbuntuCopy
We configure Samba by modifying the /etc/samba/smb.conf file:$ sudo vim /etc/samba/smb.confCopy
In the file, we can change the workgroup name:workgroup = WORKGROUPCopy
However, we’ll leave it at its default name. Next, at the end of the file, we create a new section for shared folders:[shared_folder] comment = Academic documents path = /home/baeldung/Documents browseable = yes read only = no guest ok = noCopy
Let’s dig into this:
Finally, we’ll add a Samba user and set a password for it:$ sudo smbpasswd -a baeldung New SMB password: Retype new SMB password: Added user baeldung.Copy
We’ll access the shared folder using these credentials. Once we configure the shared folder, it’s time to launch the Samba service.
The Samba service or smbd daemon functions as a server and handles the SMB requests, print services, and authentication.
Let’s start the service:
$ sudo systemctl start smbd.serviceCopy
Now, let’s verify that it’s running:$ systemctl status smbd.service sudo systemctl status smbd.service ⦿ smbd.service - Samba SMB Daemon Loaded: loaded (/lib/systemd/system/smbd.service; enabled; preset: enabled)Copy
We’re now ready to access our Linux system’s shared folder on a Mac. For that purpose, we only need Finder. In Finder, navigate to Go → Connect to Server: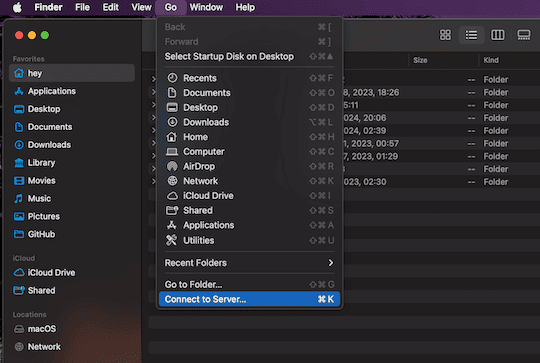
In the dialog, select Browse: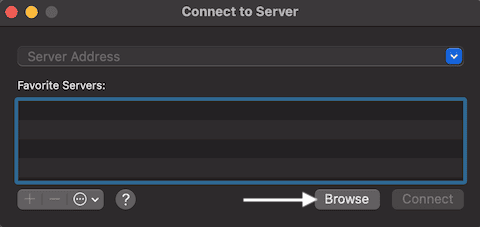
Afterward, Finder will open a new window, where we can see the shared folders: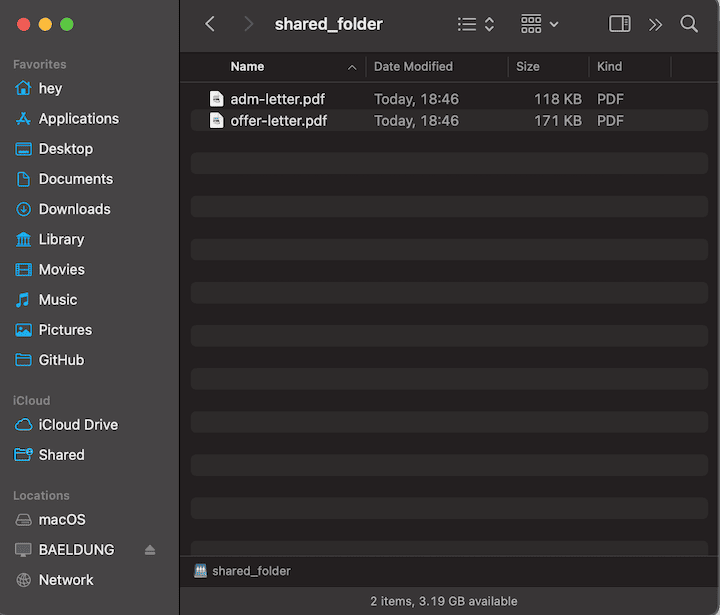
In this article, we learned how to share files between Linux and macOS. We used the Samba networking tool to easily share and access folders across these two operating systems.
Refference – https://www.baeldung.com/linux/file-sharing-macos